Create your first course
A course is the container that holds every lesson, test and certificate a learner works through. This article walks through creating one from scratch.
Before you start
You need the Admin or Instructor role. If you plan to file the course under a category, create it under Content → Categories first.
Step 1 — Open Manage Courses
Open Content → Courses from the sidebar. The Manage Courses screen lists every existing course with its status, category and enrolment count. Click New course in the top right to open the creation drawer.
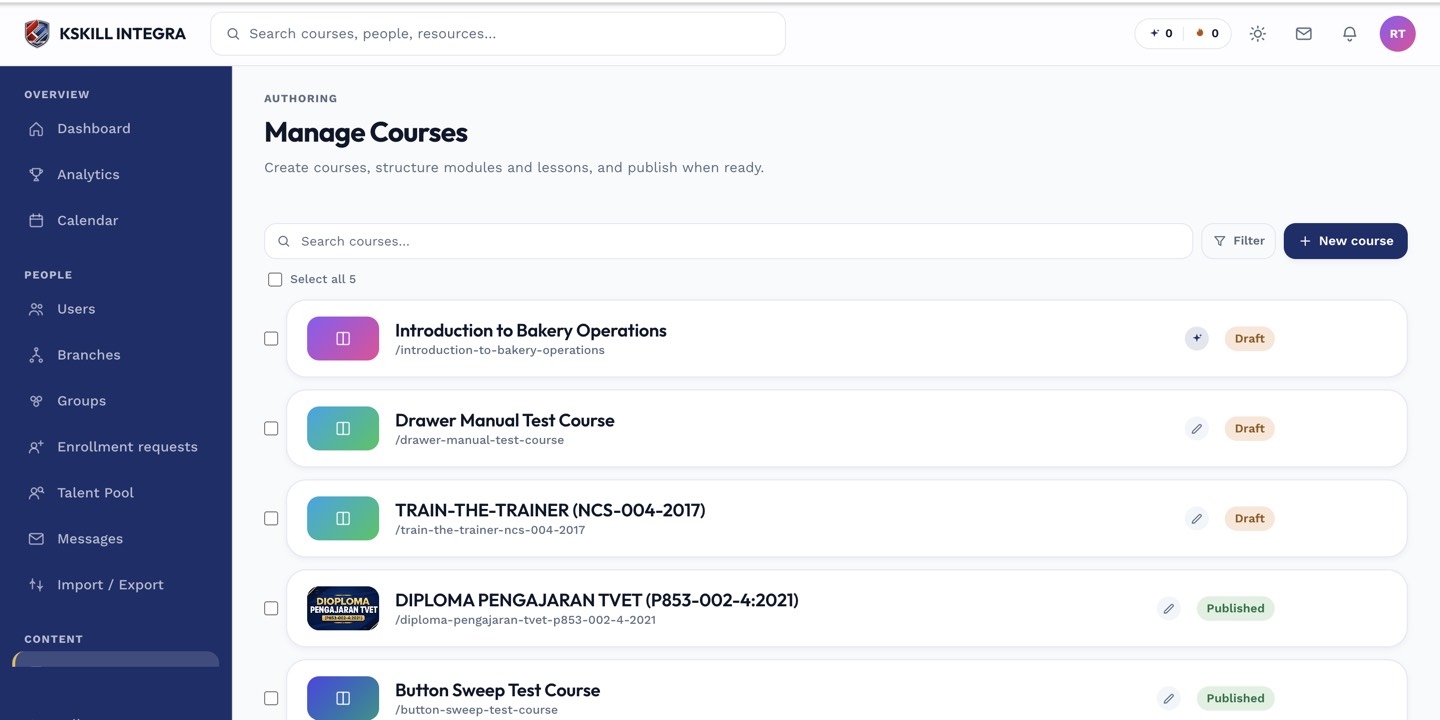
The Manage Courses screen is the launch pad for anything course-related.
Step 2 — Pick a starting point
In the drawer, choose Manual when you already have a script, or AI when you want an outline drafted from a short prompt. Fill in a title, category and cover image, then click Save as draft. AI drafts are always editable afterwards — nothing is published until you flip visibility.
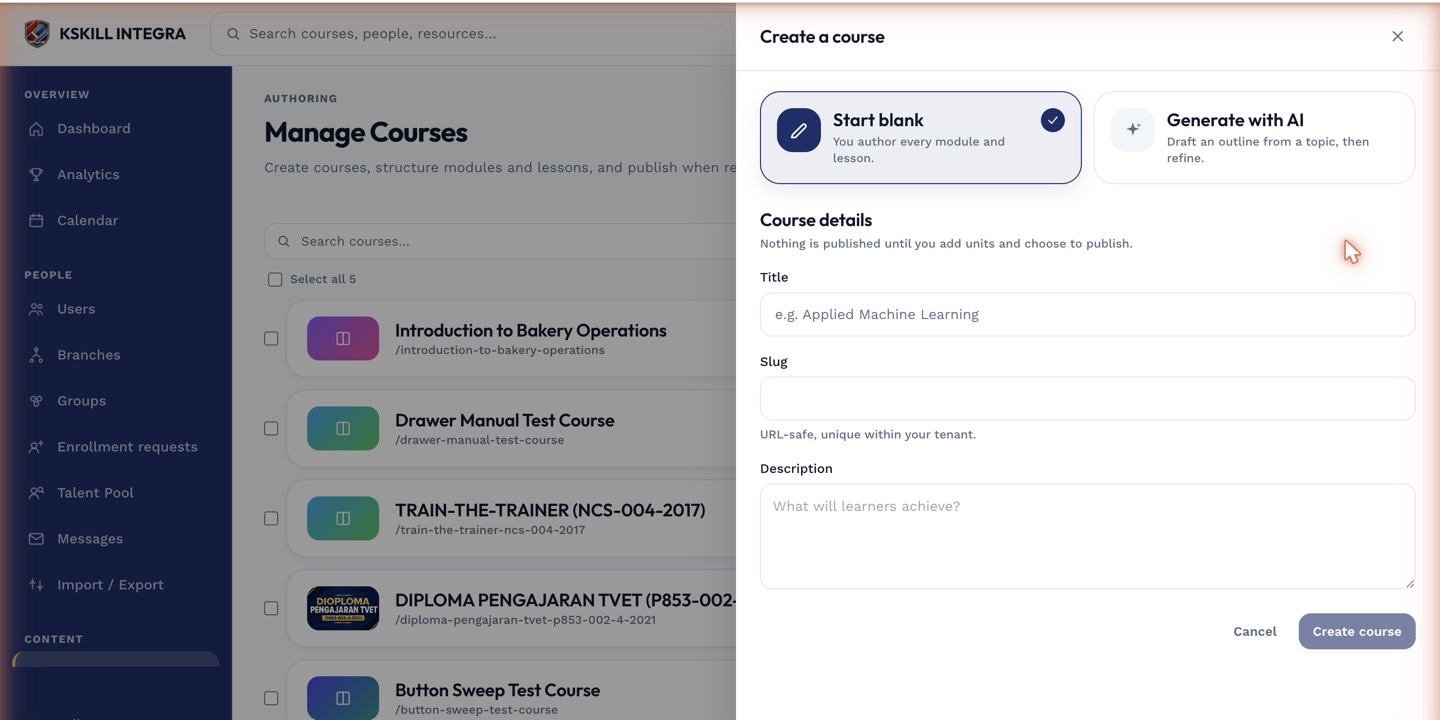
The drawer is the same one every course-creation flow lands on.
Step 3 — Configure course options
The course lands in the editor. Open the options drawer to set visibility (Draft, Published or Public in catalog), pricing (free, paid or unlisted) and the completion criteria (finish every unit, pass a final exam, or reach a total time). These decide who can see the course and how the platform decides it is done.
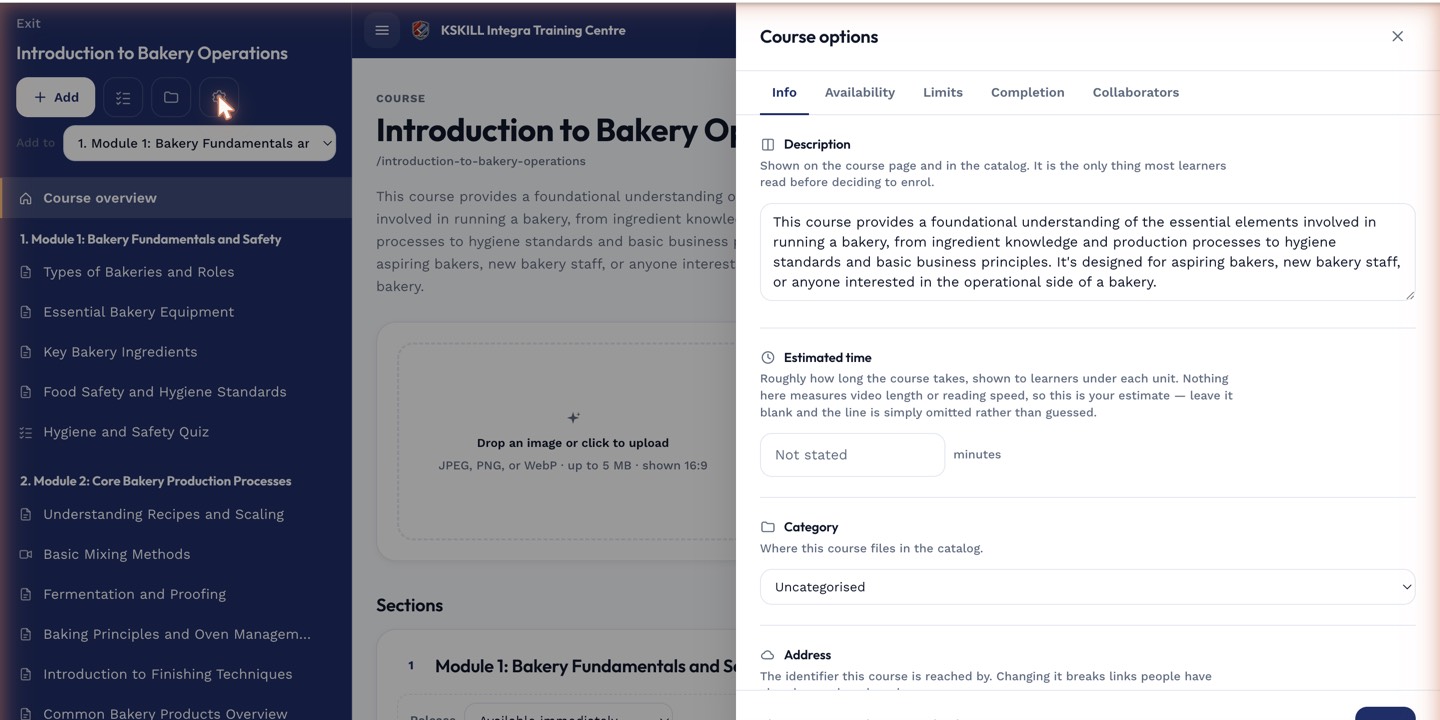
The options drawer is where every per-course rule lives — visibility, price, completion criteria, expiration.
Notes
- Manual is right when you already have SME-authored notes. AI is right when you have a topic but no draft yet.
- Published courses can be manually enrolled or auto-enrolled via a Group. Catalog courses also appear in the learner catalog for self-enrolment.