Update your profile
Your profile is what other people on the tenant see. Keep it up to date so instructors, admins and cohort peers can recognise you.
Before you start
You need to be signed in. Any authenticated user can edit their own profile — admins do not need to do it for you.
Step 1 — Open account settings
Click your profile picture in the top right and pick Account settings. The page opens on the Profile tab with every editable field visible: first and last name, display name, avatar, bio and any custom fields your tenant has defined.
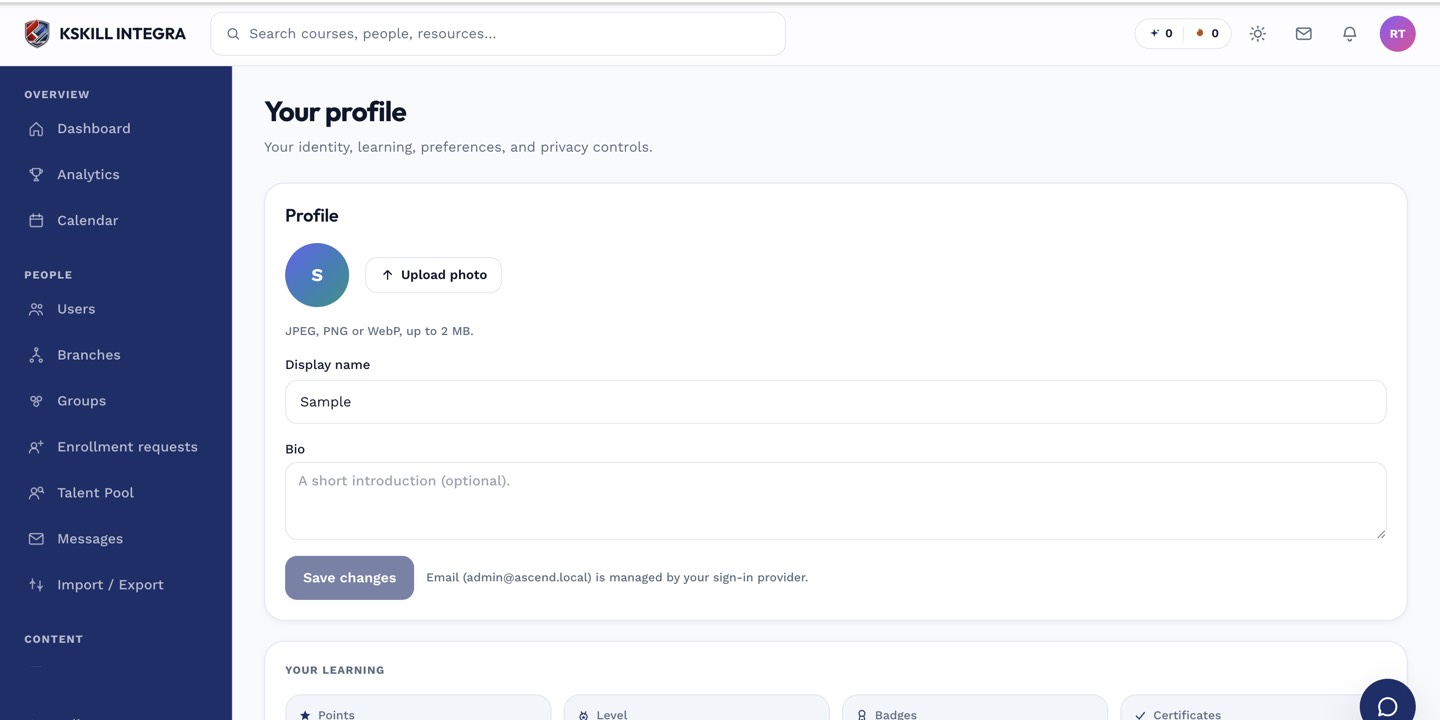
The account settings page is where a learner controls their own personal data.
Step 2 — Upload an avatar
Click the avatar circle at the top of the profile card and drop in a square image at least 200×200 pixels. The image is cropped to a circle on every screen that shows your face — course discussions, cohort rosters, leaderboards. Save the change and the new avatar is live immediately.
The account settings page is where a learner controls their own personal data.
Step 3 — Set notification preferences
Switch to the Notifications tab to control what you get emailed about. Every event type has an email switch and (where the tenant has enabled it) an in-app switch. Toggle anything you find noisy off.
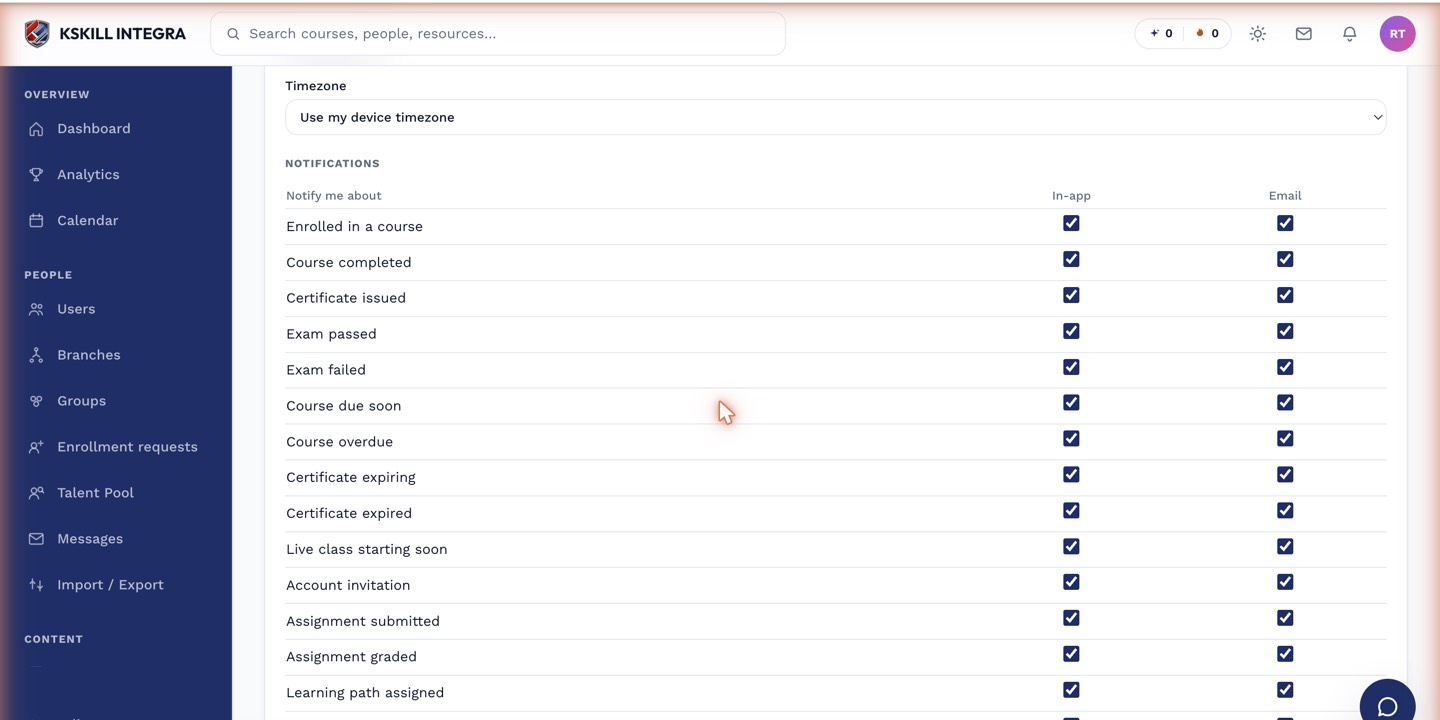
The preferences table is the per-user matrix of every event by every channel.
Notes
- Custom fields defined by your admin show up in the same form — treat them like any other profile field.
- Your avatar and display name are the only things other learners see; email is admin-only.